In recent years, we have witnessed an unprecedented increase in our knowledge and understanding of the casting procedures. Because of this increased awareness, the list of prerequisites has been steadily amended as they have become known. A variety of rules and tips have now been identified, which incorporate the latest technology for making reliable castings. These different tips can be followed during the various stages of metal casting to produce successful castings.
These tips should be used in addition to existing conventional technical specifications, including - alloy type, strength and other established foundry controls such as casting temperature, etc.
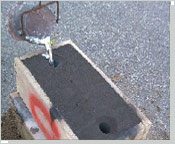
 Mold Preparation
- Heat mold and talcum in advance.
- Apply talcum evenly and clap halves together to get rid of excess quantity.
- Add O Rings to body to provide later adjustments.
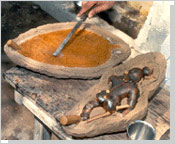
 Melting the Metal
- Use an electric hob to melt the dry metal.
- Don't over clamp the molds. Rough sides of boards should face into mold.
- Stir with used match to test for heat. Wait till the match starts to brown and discharges a little amount of smoke. Don't overheat.
- Push slag away from the pouring spout.
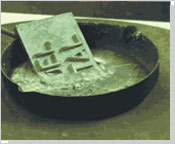
 Pouring the Metal
- Pour softly to fill the well of the mold.
- Tap the mold smoothly for a few seconds after pouring.
- Cease the tapping when the metal start to cool and stiffen.
- Wait for at least 5 minutes before opening the mold.
- If a gap seems in the casting, remelt the metal and try again.
- Consider venting for stubborn regions.
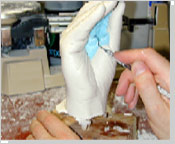
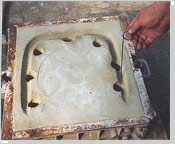 Venting the Mold
- Use a sharp knife and heat the mold while cutting vents.
- Cut from the defected area to top of mold or to the surrounding sprue.
- Recast the design with attention to detail.
- Wait for at least 5 minutes before opening the mold.
- Keep both parts of the mold at same temperature.
- Bend the mold while removing the figure to prevent any damage.
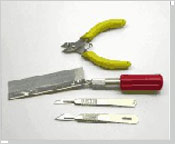 Cutting the Parts
- Twist the protective sprue away from parts.
- Turn flat part of snips to the part desired.
- Cut at least 2mm from part.
- Score sprue with knife to protect the soft parts.
- Thicker sprue may require further scoring or even the use of a bladesaw to weaken the sprue and forestall the damage to the part.
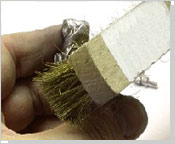
 Filling the Parts
- Use a flat file to file the gate in a balanced manner.
- Get rid of sharp corners and bevel edges to prevent the paint peeling.
- Use needle files to get rid of seamlines.
- Follow shapes of figure not filing flat.
- Use small files for details.
 Preparing to Glue Parts
- Softly polish the parts.
- Check fitting and match of parts before gluing.
- Roughen up the areas slenderly to give the glue a better grip.
- Glue or solder.
- Leave unmanageable parts for painting separate.